
源码解析基于Android 11
前言
What:zygote的作用是什么?
- How:zygote的启动流程是什么?
- 启动的时候做了什么事,有哪些关键步骤?
- Why:zygote的工作原理是什么?
- 怎么启动进程,如何跟别人通信?
- 这道题想考察什么?
- 了解Zygote的作用(初级)
- 熟悉Zygote的启动流程(中级)
- 深刻理解Zygote的工作原理(高级)
- 可参考文章
- https://github.com/jeanboydev/Android-ReadTheFuckingSourceCode/tree/master/article/android
- https://superandroid.pro/2020/03/06/android-10-xi-tong-qi-dong-xi-lie-zygote-jin-cheng-fu-hua-qi/
1、 Zygote的作用
Zygote 的字面意思就是受精卵,我们身上的所有细胞基本都是源于受精卵有丝分裂而来,而zygote进程对于Android系统的意义也如同受精卵对于生命的意义一般。Android系统中所有的应用进程以及系统进程都是由zygote创建出来的。

zygote进程主要负责创建 Java 虚拟机,加载系统资源,启动 SystemServer 进程,以及在后续运行过程中启动普通的应用程序。
1、启动SystemServer
为什么SystemServer要在zygote里面启动:
需要使用zygote准备好的相关系统资源:常用类, JNI函数, 主题资源, 共享库
2、孵化应用进程
2、zygote的启动流程
2.1、进程是怎么启动的?

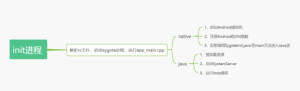
前文讲到, zygote 进程是init 进程解析rc文件之后创建的,所对应的可执行文件是/system/bin/app_process。进入App_main.cpp的main()函数。故zygote是通过fork和execv共同创建的。
在 init.rc 文件头部有这么一句: import /init.${ro.zygote}.rc
从android5.0开始,android开始支持64位的编译,zygote本身也就有了32位和64位的区别,所以在这里用ro.zygote属性来控制启动不同版本的zygote进程。
其中 ${ro.zygote} 会被替换成 ro.zyogte 的属性值,这主要是因为 Android 5.0 以后开始支持 64 位程序,为了兼容 32 位和 64 位才这样定义。 有四个值:zygote32、zygote64、zygote32_64、zygote64_32 ,也就是说可能有四种 .rc 文件,分别是:
init.zygote32.rc:zygote 进程对应的执行程序是 app_process(纯 32bit 模式)。
- init.zygote64.rc:zygote 进程对应的执行程序是 app_process64(纯 64bit 模式)。
- init.zygote32_64.rc:启动两个 zygote 进程(名为 zygote 和 zygote_secondary),对应的执行程序分别是 app_process32(主模式)、app_process64。
- init.zygote64_32.rc:启动两个 zygote 进程(名为 zygote 和 zygote_secondary),对应的执行程序分别是 app_process64(主模式)、app_process32。
在 init.zygote64_32.rc 文件中的头部我们可以看到 zygote 对应的二进制文件是 /system/bin/app_process64 (以此为例),
其实不管是 app_process、app_process32 还是 app_process64,对应的源文件都是 app_main.cpp。
最终 在\android\frameworks\base\cmds\app_process\app_main.cpp 的 main方法启动init.rc中定义的服务,如 zygote servicemanager 和 zygote 等服务。
2.2、 zygote进程启动之后做了什么?
zygote进程启动后的逻辑主要分为两部分:1是native层的逻辑 2是Java层的逻辑。
2.2.1 Zygote的Native层逻辑
Zygote的native 层逻辑主要是为了进入Java层逻辑做准备。
Zygote是由init进程通过解析init.zygote.rc文件而创建的,zygote所对应的可执行程序app_process,所对应的源文件是App_main.cpp,进程名为zygote。
在App_main.cpp mian方法中主要是 设置进程名,解析AndroidRuntime 启动参数。
然后通过AndroidRuntime的start方法做主要的工作
1、启动Android虚拟机
AndroidRuntime->Start() - >startVm()
2、注册Android的JNI函数
AndroidRuntime->Start() - >startReg()
3、进入Java层
在AndroidRuntime->Start() -方法的最后会反射调用ZygoteInit.java 的main方法从而进入zygote的Java世界
frameworks/base/cmds/app_process/app_main.cpp
int main(int argc, char* const argv[])
{

    AppRuntime runtime(argv[0], computeArgBlockSize(argc, argv));
    // Process command line arguments
    // ignore argv[0]

    ··········(中间省略逻辑为解析runtime参数)

    // Parse runtime arguments.  Stop at first unrecognized option.
    bool zygote = false;
    bool startSystemServer = false;
    bool application = false;
    String8 niceName;
    String8 className;

   //根据参数来识别启动模式
    ++i;  // Skip unused "parent dir" argument.
    while (i < argc) {
        const char* arg = argv[i++];

        if (strcmp(arg, "--zygote") == 0) {
            //zygote模式
            zygote = true;
            niceName = ZYGOTE_NICE_NAME;
        } else if (strcmp(arg, "--start-system-server") == 0) {
            //启动系统服务标识
            startSystemServer = true;
        } else if (strcmp(arg, "--application") == 0) {
             //启动应用进程
            application = true;
        } else if (strncmp(arg, "--nice-name=", 12) == 0) {
            niceName.setTo(arg + 12);
        } else if (strncmp(arg, "--", 2) != 0) {
            className.setTo(arg);
            break;
        } else {
            --i;
            break;
        }
    }

    Vector<String8> args;
    if (!className.isEmpty()) {
        ·······(启动Application)
    } else {
        // We're in zygote mode.
        maybeCreateDalvikCache();

        if (startSystemServer) {
            args.add(String8("start-system-server"));
        }

        char prop[PROP_VALUE_MAX];
        if (property_get(ABI_LIST_PROPERTY, prop, NULL) == 0) {
            LOG_ALWAYS_FATAL("app_process: Unable to determine ABI list from property %s.",
                ABI_LIST_PROPERTY);
            return 11;
        }

        String8 abiFlag("--abi-list=");
        abiFlag.append(prop);
        args.add(abiFlag);

        // In zygote mode, pass all remaining arguments to the zygote
        // main() method.
        for (; i < argc; ++i) {
            args.add(String8(argv[i]));
        }
    }

    if (!niceName.isEmpty()) {
        runtime.setArgv0(niceName.string(), true /* setProcName */);
    }

    if (zygote) {
        //如果当前是zygote mode 则加载ygote
        runtime.start("com.android.internal.os.ZygoteInit", args, zygote);
    } else if (className) {
        //如果当前是application mode 则加载zygote
        runtime.start("com.android.internal.os.RuntimeInit", args, zygote);
    } else {
        fprintf(stderr, "Error: no class name or --zygote supplied.\n");
        app_usage();
        LOG_ALWAYS_FATAL("app_process: no class name or --zygote supplied.");
    }
}
可以看到app_main.cpp 主要的工作就是解析参数,然后通过runtime去做真正的启动工作 (通过筛选AppRuntime 可以查看相关log)
frameworks/base/core/jni/AndroidRuntime.cpp
/*
 * Start the Android runtime.  This involves starting the virtual machine
 * and calling the "static void main(String[] args)" method in the class
 * named by "className".
 *
 * Passes the main function two arguments, the class name and the specified
 * options string.
 */
void AndroidRuntime::start(const char* className, const Vector<String8>& options, bool zygote)
{

   ······

    //const char* kernelHack = getenv("LD_ASSUME_KERNEL");
    //ALOGD("Found LD_ASSUME_KERNEL='%s'\n", kernelHack);

    /* start the virtual machine */
    JniInvocation jni_invocation;
    jni_invocation.Init(NULL);
    JNIEnv* env;

    //启动虚拟机
    if (startVm(&mJavaVM, &env, zygote, primary_zygote) != 0) {
        return;
    }
    onVmCreated(env);

    /*
     * 注册JNI方法
     * Register android functions.
     */
    if (startReg(env) < 0) {
        ALOGE("Unable to register all android natives\n");
        return;
    }

    /*
     * We want to call main() with a String array with arguments in it.
     * At present we have two arguments, the class name and an option string.
     * Create an array to hold them.
     */
    jclass stringClass;
    jobjectArray strArray;
    jstring classNameStr;

    stringClass = env->FindClass("java/lang/String");
    assert(stringClass != NULL);
    strArray = env->NewObjectArray(options.size() + 1, stringClass, NULL);
    assert(strArray != NULL);
    classNameStr = env->NewStringUTF(className);
    assert(classNameStr != NULL);
    env->SetObjectArrayElement(strArray, 0, classNameStr);

    for (size_t i = 0; i < options.size(); ++i) {
        jstring optionsStr = env->NewStringUTF(options.itemAt(i).string());
        assert(optionsStr != NULL);
        env->SetObjectArrayElement(strArray, i + 1, optionsStr);
    }

    /*
     * Start VM.  This thread becomes the main thread of the VM, and will
     * not return until the VM exits.
     */

     //找到zygote class类
    char* slashClassName = toSlashClassName(className != NULL ? className : "");
    jclass startClass = env->FindClass(slashClassName);
    if (startClass == NULL) {
        ALOGE("JavaVM unable to locate class '%s'\n", slashClassName);
        /* keep going */
    } else {
        //找到zygote main 函数的id
        jmethodID startMeth = env->GetStaticMethodID(startClass, "main",
            "([Ljava/lang/String;)V");
        if (startMeth == NULL) {
            ALOGE("JavaVM unable to find main() in '%s'\n", className);
            /* keep going */
        } else {
            // 通过反射调用ZygoteInit 的 main 方法
            env->CallStaticVoidMethod(startClass, startMeth, strArray);

#if 0
            if (env->ExceptionCheck())
                threadExitUncaughtException(env);
#endif
        }
    }
    free(slashClassName);

    ALOGD("Shutting down VM\n");
    if (mJavaVM->DetachCurrentThread() != JNI_OK)
        ALOGW("Warning: unable to detach main thread\n");
    if (mJavaVM->DestroyJavaVM() != 0)
        ALOGW("Warning: VM did not shut down cleanly\n");
}
2.2.2 Zygote的Java层逻辑
Zygote进入Java层的入口就是main函数,main函数主要干了三件事
① 预加载资源
② 启动SystemServer
③ 进行loop循环
frameworks/base/core/java/com/android/internal/os/ZygoteInit.java
   /**
     * This is the entry point for a Zygote process.  It creates the Zygote server, loads resources,
     * and handles other tasks related to preparing the process for forking into applications.
     *
     * This process is started with a nice value of -20 (highest priority).  All paths that flow
     * into new processes are required to either set the priority to the default value or terminate
     * before executing any non-system code.  The native side of this occurs in SpecializeCommon,
     * while the Java Language priority is changed in ZygoteInit.handleSystemServerProcess,
     * ZygoteConnection.handleChildProc, and Zygote.usapMain.
     *
     * @param argv  Command line arguments used to specify the Zygote's configuration.
     */
    @UnsupportedAppUsage
    public static void main(String argv[]) {
        ZygoteServer zygoteServer = null;

        // Mark zygote start. This ensures that thread creation will throw
        // an error.
        ZygoteHooks.startZygoteNoThreadCreation();

        // Zygote goes into its own process group.
        try {
            Os.setpgid(0, 0);
        } catch (ErrnoException ex) {
            throw new RuntimeException("Failed to setpgid(0,0)", ex);
        }

        Runnable caller;
        try {
            // Store now for StatsLogging later.
            final long startTime = SystemClock.elapsedRealtime();
            final boolean isRuntimeRestarted = "1".equals(
                    SystemProperties.get("sys.boot_completed"));

            String bootTimeTag = Process.is64Bit() ? "Zygote64Timing" : "Zygote32Timing";
            TimingsTraceLog bootTimingsTraceLog = new TimingsTraceLog(bootTimeTag,
                    Trace.TRACE_TAG_DALVIK);
            bootTimingsTraceLog.traceBegin("ZygoteInit");
            RuntimeInit.preForkInit();

            boolean startSystemServer = false;
            String zygoteSocketName = "zygote";
            String abiList = null;
            boolean enableLazyPreload = false;

             //解析app_main.cpp - start()传入的参数
            for (int i = 1; i < argv.length; i++) {
                if ("start-system-server".equals(argv[i])) {
                    startSystemServer = true;
                } else if ("--enable-lazy-preload".equals(argv[i])) {
                    enableLazyPreload = true;
                } else if (argv[i].startsWith(ABI_LIST_ARG)) {
                    abiList = argv[i].substring(ABI_LIST_ARG.length());
                } else if (argv[i].startsWith(SOCKET_NAME_ARG)) {
                    zygoteSocketName = argv[i].substring(SOCKET_NAME_ARG.length());
                } else {
                    throw new RuntimeException("Unknown command line argument: " + argv[i]);
                }
            }

            final boolean isPrimaryZygote = zygoteSocketName.equals(Zygote.PRIMARY_SOCKET_NAME);
            if (!isRuntimeRestarted) {
                if (isPrimaryZygote) {
                    FrameworkStatsLog.write(FrameworkStatsLog.BOOT_TIME_EVENT_ELAPSED_TIME_REPORTED,
                            BOOT_TIME_EVENT_ELAPSED_TIME__EVENT__ZYGOTE_INIT_START,
                            startTime);
                } else if (zygoteSocketName.equals(Zygote.SECONDARY_SOCKET_NAME)) {
                    FrameworkStatsLog.write(FrameworkStatsLog.BOOT_TIME_EVENT_ELAPSED_TIME_REPORTED,
                            BOOT_TIME_EVENT_ELAPSED_TIME__EVENT__SECONDARY_ZYGOTE_INIT_START,
                            startTime);
                }
            }

            if (abiList == null) {
                throw new RuntimeException("No ABI list supplied.");
            }

            // In some configurations, we avoid preloading resources and classes eagerly.
            // In such cases, we will preload things prior to our first fork.
            if (!enableLazyPreload) {
                bootTimingsTraceLog.traceBegin("ZygotePreload");
                EventLog.writeEvent(LOG_BOOT_PROGRESS_PRELOAD_START,
                        SystemClock.uptimeMillis());

                //1、 预加载相关资源
                preload(bootTimingsTraceLog);
                EventLog.writeEvent(LOG_BOOT_PROGRESS_PRELOAD_END,
                        SystemClock.uptimeMillis());
                bootTimingsTraceLog.traceEnd(); // ZygotePreload
            }

            // Do an initial gc to clean up after startup
            bootTimingsTraceLog.traceBegin("PostZygoteInitGC");
            gcAndFinalize();
            bootTimingsTraceLog.traceEnd(); // PostZygoteInitGC

            bootTimingsTraceLog.traceEnd(); // ZygoteInit

            Zygote.initNativeState(isPrimaryZygote);

            ZygoteHooks.stopZygoteNoThreadCreation();

            zygoteServer = new ZygoteServer(isPrimaryZygote);

            //2、 启动systemServer
            if (startSystemServer) {
                Runnable r = forkSystemServer(abiList, zygoteSocketName, zygoteServer);

                // {@code r == null} in the parent (zygote) process, and {@code r != null} in the
                // child (system_server) process.
                if (r != null) {
                    r.run();
                    return;
                }
            }

            Log.i(TAG, "Accepting command socket connections");

            // The select loop returns early in the child process after a fork and
            // loops forever in the zygote.
            // 3、进入loop循环,处理请求
            caller = zygoteServer.runSelectLoop(abiList);
        } catch (Throwable ex) {
            Log.e(TAG, "System zygote died with exception", ex);
            throw ex;
        } finally {
            if (zygoteServer != null) {
                zygoteServer.closeServerSocket();
            }
        }

        // We're in the child process and have exited the select loop. Proceed to execute the
        // command.
        if (caller != null) {
            caller.run();
        }
    }
① 预加载资源
预加载资源主要,预加载 类、图片颜色等资源文件,而且只在zygote进程启动的时候只加载一次。zygote fork子进程时,子进程可以直接使用该资源不需要重新加载。
预加载的原理: zygote进程启动后将资源读取出来,保存到Resources一个全局静态变量中,下次读取系统资源的时候优先从静态变量中查找。
  static void preload(TimingsTraceLog bootTimingsTraceLog) {
        Log.d(TAG, "begin preload");

       ······
        beginPreload();
       ······

        //预加载类
        preloadClasses();

        //加载图片、颜色等资源文件
        preloadResources();

        nativePreloadAppProcessHALs();

        maybePreloadGraphicsDriver();

       // 预加载类库
        preloadSharedLibraries();

         //预加载文字资源
        preloadTextResources();
        // Ask the WebViewFactory to do any initialization that must run in the zygote process,
        // for memory sharing purposes. 初始化webView
        WebViewFactory.prepareWebViewInZygote();
        endPreload();
        warmUpJcaProviders();
        Log.d(TAG, "end preload");

        sPreloadComplete = true;
    }
② 启动系统服务
    /**
     * Prepare the arguments and forks for the system server process.
     *
     * @return A {@code Runnable} that provides an entrypoint into system_server code in the child
     * process; {@code null} in the parent.
     */
    private static Runnable forkSystemServer(String abiList, String socketName,
            ZygoteServer zygoteServer) {
        long capabilities = posixCapabilitiesAsBits(
                OsConstants.CAP_IPC_LOCK,
                OsConstants.CAP_KILL,
                OsConstants.CAP_NET_ADMIN,
                OsConstants.CAP_NET_BIND_SERVICE,
                OsConstants.CAP_NET_BROADCAST,
                OsConstants.CAP_NET_RAW,
                OsConstants.CAP_SYS_MODULE,
                OsConstants.CAP_SYS_NICE,
                OsConstants.CAP_SYS_PTRACE,
                OsConstants.CAP_SYS_TIME,
                OsConstants.CAP_SYS_TTY_CONFIG,
                OsConstants.CAP_WAKE_ALARM,
                OsConstants.CAP_BLOCK_SUSPEND
        );
        /* Containers run without some capabilities, so drop any caps that are not available. */
        StructCapUserHeader header = new StructCapUserHeader(
                OsConstants._LINUX_CAPABILITY_VERSION_3, 0);
        StructCapUserData[] data;
        try {
            data = Os.capget(header);
        } catch (ErrnoException ex) {
            throw new RuntimeException("Failed to capget()", ex);
        }
        capabilities &= ((long) data[0].effective) | (((long) data[1].effective) << 32);

        /* Hardcoded command line to start the system server */
        String args[] = {
                "--setuid=1000",
                "--setgid=1000",
                "--setgroups=1001,1002,1003,1004,1005,1006,1007,1008,1009,1010,1018,1021,1023,"
                        + "1024,1032,1065,3001,3002,3003,3006,3007,3009,3010,3011",
                "--capabilities=" + capabilities + "," + capabilities,
                "--nice-name=system_server",
                "--runtime-args",
                "--target-sdk-version=" + VMRuntime.SDK_VERSION_CUR_DEVELOPMENT,
                "com.android.server.SystemServer",
        };
        ZygoteArguments parsedArgs = null;

        int pid;

        try {
            parsedArgs = new ZygoteArguments(args);
            Zygote.applyDebuggerSystemProperty(parsedArgs);
            Zygote.applyInvokeWithSystemProperty(parsedArgs);

            if (Zygote.nativeSupportsTaggedPointers()) {
                /* Enable pointer tagging in the system server. Hardware support for this is present
                 * in all ARMv8 CPUs. */
                parsedArgs.mRuntimeFlags |= Zygote.MEMORY_TAG_LEVEL_TBI;
            }

            /* Enable gwp-asan on the system server with a small probability. This is the same
             * policy as applied to native processes and system apps. */
            parsedArgs.mRuntimeFlags |= Zygote.GWP_ASAN_LEVEL_LOTTERY;

            if (shouldProfileSystemServer()) {
                parsedArgs.mRuntimeFlags |= Zygote.PROFILE_SYSTEM_SERVER;
            }

            /* Request to fork the system server process */
            //通过fork方式生成 systemServer子进程
            pid = Zygote.forkSystemServer(
                    parsedArgs.mUid, parsedArgs.mGid,
                    parsedArgs.mGids,
                    parsedArgs.mRuntimeFlags,
                    null,
                    parsedArgs.mPermittedCapabilities,
                    parsedArgs.mEffectiveCapabilities);
        } catch (IllegalArgumentException ex) {
            throw new RuntimeException(ex);
        }

        /* For child process */
        if (pid == 0) {
            if (hasSecondZygote(abiList)) {
                waitForSecondaryZygote(socketName);
            }

            zygoteServer.closeServerSocket();
            return handleSystemServerProcess(parsedArgs);
        }

        return null;
    }
forkSystemServer()会在新fork出的子进程中调用 handleSystemServerProcess(),
主要是返回Runtime.java的MethodAndArgsCaller的方法,然后通过r.run() 启动com.android.server.SystemServer的main 方法
③ runSelectLoop()
/
frameworks/base/core/java/com/android/internal/os/ZygoteServer.java
- 要注意的细节
- Zygote fork要单线程(多线程fork 容易死锁或者线程状态不一致)
- Zygote的IPC没有采用binder(使用本地socket)
- 两个问题
- 1、孵化应用进程这种事为什么不交给SystemServer来做,而专门设计一个Zygote?
- 我们知道,应用在启动的时候需要做很多准备工作,包括启动虚拟机,加载各类系统资源等等,这些都是非常耗时的,如果能在zygote里就给这些必要的初始化工作做好,子进程在fork的时候就能直接共享,那么这样的话效率就会非常高。这个就是zygote存在的价值,这一点呢SystemServer是替代不了的,主要是因为SystemServer里跑了一堆系统服务,这些是不能继承到应用进程的。而且我们应用进程在启动的时候,内存空间除了必要的资源外,最好是干干净净的,不要继承一堆乱七八糟的东西。所以呢,不如给SystemServer和应用进程里都要用到的资源抽出来单独放在一个进程里,也就是这的zygote进程,然后zygote进程再分别孵化出SystemServer进程和应用进程。孵化出来之后,SystemServer进程和应用进程就可以各干各的事了。
- 2、Zygote的IPC通信机制为什么不采用binder?如果采用binder的话会有什么问题么?
- 第一个原因,我们可以设想一下采用binder调用的话该怎么做,首先zygote要启用binder机制,需要打开binder驱动,获得一个描述符,再通过mmap进行内存映射,还要注册binder线程,这还不够,还要创建一个binder对象注册到serviceManager,另外AMS要向zygote发起创建应用进程请求的话,要先从serviceManager查询zygote的binder对象,然后再发起binder调用,这来来回回好几趟非常繁琐,相比之下,zygote和SystemServer进程本来就是父子关系,对于简单的消息通信,用管道或者socket非常方便省事。第二个原因,如果zygote启用binder机制,再fork出SystemServer,那么SystemServer就会继承了zygote的描述符以及映射的内存,这两个进程在binder驱动层就会共用一套数据结构,这显然是不行的,所以还得先给原来的旧的描述符关掉,再重新启用一遍binder机制,这个就是自找麻烦了。
zygote的工作机制
- loop如何处理请求
- zZygoteInit.java ->runSelectLoop() ->ZygoteConnection.java->runOnce()
- 3 进行loop循环 ZygoteInit.java ->runSelectLoop()
-
-
2 启动SystemServer ZygoteInit.java -> startSystemServer()
-
preloadClasses();
- 通过反射方式预加载位于/system/etc/preloaded-classes文件中的类
- 可以通过 adb shell cat /system/etc/preloaded-classes 命令查看 里面都是一些Java 和 Android 常用的类
- preloadResources();
- 预加载资源,包含drawable和color资源
- preloadOpenGL()
- 预加载OpenGL
- preloadSharedLibraries();
- //通过System.loadLibrary()方法, 预加载"android","compiler_rt","jnigraphics"这3个共享库
- preloadTextResources()
- 预加载 文本连接符资源 ;
- WebViewFactory.prepareWebViewInZygote();
- 仅用于zygote进程,用于内存共享的进程
-
zygote进程内加载了preload()方法中的所有资源,当需要fork新进程时,采用copy on write技术,这也是为什么启动应用进程要交由zygote来做的原因。
-
1 预加载资源 ZygoteInit.java -> preload()
- 在preload 主要是加载 类、drawable color openGl
流程图
Zygote的Java世界 ZygoteInit.java -> main()
由父进程fork出来的子进程如果终止了,那么父进程会受到SIGCHILD信号
5.1 为什么SystemServer和Zygote之间通信要采用Socket
进程间通信我们常用的是binder,为什么这里要采用socket呢。
主要是为了解决fork的问题:
UNIX上C++程序设计守则3:多线程程序里不准使用fork
Binder通讯是需要多线程操作的,代理对象对Binder的调用是在Binder线程,需要再通过Handler调用主线程来操作。
比如AMS与应用进程通讯,AMS的本地代理IApplicationThread通过调用ScheduleLaunchActivity,调用到的应用进程ApplicationThread的ScheduleLaunchActivity是在Binder线程,
需要再把参数封装为一个ActivityClientRecord,sendMessage发送给H类(主线程Handler,ActivityThread内部类)
主要原因:害怕父进程binder线程有锁,然后子进程的主线程一直在等其子线程(从父进程拷贝过来的子进程)的资源,但是其实父进程的子进程并没有被拷贝过来,造成死锁。
所以fork不允许存在多线程。而非常巧的是Binder通讯偏偏就是多线程,所以干脆父进程(Zgote)这个时候就不使用binder线程
5.2为什么一个java应用一个虚拟机?
android的VM(vm==Virtual Machine )也是类似JRE的东西,当然,各方面都截然不同,不过有一个作用都是一样的,为app提供了运行环境
android为每个程序提供一个vm,可以使每个app都运行在独立的运行环境,使稳定性提高。
vm的设计可以有更好的兼容性。android apk都被编译成字节码(bytecode),在运行的时候,vm是先将字节码编译真正可执行的代码,否则不同硬件设备的兼容是很大的麻烦。
android(非ROOT)没有windows下键盘钩子之类的东西,每个程序一个虚拟机,各个程序之间也不可以随意访问内存,所以此类木马病毒几乎没有。
5.3 什么是Zygote资源预加载
预加载是指在zygote进程启动的时候就加载,这样系统只在zygote执行一次加载操作,所有APP用到该资源不需要再重新加载,减少资源加载时间,加快了应用启动速度,一般情况下,系统中App共享的资源会被列为预加载资源。
zygote fork子进程时,根据fork的copy-on-write机制可知,有些类如果不做改变,甚至都不用复制,子进程可以和父进程共享这部分数据,从而省去不少内存的占用。
5.4 Zygote为什么要预加载
应用程序都从Zygote孵化出来,应用程序都会继承Zygote的所有内容。
如果在Zygote启动的时候加载这些类和资源,这些孵化的应用程序就继承Zygote的类和资源,这样启动引用程序的时候就不需要加载类和资源了,启动的速度就会快很多。
开机的次数不多,但是启动应用程序的次数非常多。
5.5 Zygote 预加载的原理是什么?
zygote进程启动后将资源读取出来,保存到Resources一个全局静态变量中,下次读取系统资源的时候优先从静态变量中查找。
总结


近期评论